I’ll never forget the morning I spilled coffee all over my kitchen counter while frantically scribbling down a pancake recipe from Good Morning America. The host had just revealed the secret to fluffy pancakes—buttermilk and a dash of vinegar—and I wasn’t about to loose that culinary gem to my faulty memory. GMA recipes have that special quality; they’re accessible yet innovative, familiar yet exciting. They transform ordinary kitchens into experimental culinary labs where magic happens daily.
For decades, Good Morning America has brought delicious, trend-setting recipes into American homes. These aren’t just any recipes—they’re carefully curated creations that balance accessibility with wow-factor, perfect for everyday cooks looking to elevate their kitchen game. Whether you’re rushing to prepare breakfast before work, planning a family dinner, or impressing weekend guests, GMA recipes offer something for every occasion and skill level.
Breakfast: Starting Your Day the GMA Way
Classic Buttermilk Pancakes with a Twist
The humble pancake might seem basic, but GMA’s version incorporates techniques that professional chefs swear by. These aren’t just regular pancakes—they’re cloud-like pillows of breakfast perfection that’ll make your family think you secretly enrolled in culinary school.
Ingredients & Substitutions
- 2 cups all-purpose flour (substitute cup-for-cup gluten-free flour blend for GF option)
- 2 tablespoons granulated sugar
- 1 teaspoon baking powder
- 1/2 teaspoon baking soda
- 1/2 teaspoon salt
- 2 cups buttermilk (or 2 cups milk with 2 tablespoons lemon juice, let sit 5 minutes)
- 2 large eggs, room temperature
- 3 tablespoons melted butter, slightly cooled
- 1 teaspoon vanilla extract
- 1 tablespoon white vinegar (the secret ingredient!)
- Butter or oil for griddle
The quality of your buttermilk matters significantly here. Commercial buttermilk works great, but if making the substitute version, use whole milk for richness. For dairy-free options, almond milk with a tablespoon of lemon juice creates a decent alternative, tho the pancakes won’t be quite as tender.
Step-by-Step Instructions
Begin by whisking all dry ingredients in a large bowl. Many cooks skip sifting, but a quick sift here prevents those dreaded flour lumps that leave dry pockets in your pancakes. Trust me on this—it’s worth the extra minute.
In a separate bowl, whisk buttermilk, eggs, melted butter, vanilla, and that secret weapon—white vinegar. The vinegar reacts with the baking soda to create extra bubbles, resulting in pancakes so fluffy they practically hover above the plate. Pour wet ingredients into dry, and fold gently until just combined. Overmixing activates gluten and makes tough pancakes—the batter should be lumpy!
Heat a griddle or non-stick pan over medium heat until a drop of water skitters across the surface. This is the perfect temperature—too hot and you’ll burn the outsides while the centers stay raw. Too cool and your pancakes will absorb too much butter and become greasy. Add a small amount of butter to the pan, then pour 1/4 cup portions of batter. When bubbles form on the surface and the edges look set (about 2-3 minutes), flip once and cook another 1-2 minutes.
Cooking Techniques & Science
The vinegar-buttermilk combination creates an acidic environment that breaks down the gluten in flour, producing a more tender result. It also reacts with baking soda to produce carbon dioxide bubbles—these bubbles get trapped in the batter and expand when heated, creating that signature fluffiness.
Let your batter rest for 5-10 minutes before cooking. This allows the flour to fully hydrate and gives the leavening agents time to start working. Don’t press down on pancakes while cooking; you’ll deflate all those beautiful air bubbles you’ve worked so hard to create.
Serving & Pairing Suggestions
Serve these beauties hot off the griddle with room-temperature (not cold) maple syrup—cold syrup cools pancakes too quickly. For an impressive brunch spread, create a pancake bar with various toppings: fresh berries, sliced bananas, chocolate chips, toasted nuts, whipped cream, and different syrups.
These pancakes pair wonderfully with crispy bacon (the salt contrasts nicely with the sweet), a side of scrambled eggs with herbs, and freshly-squeezed orange juice or a robust coffee.
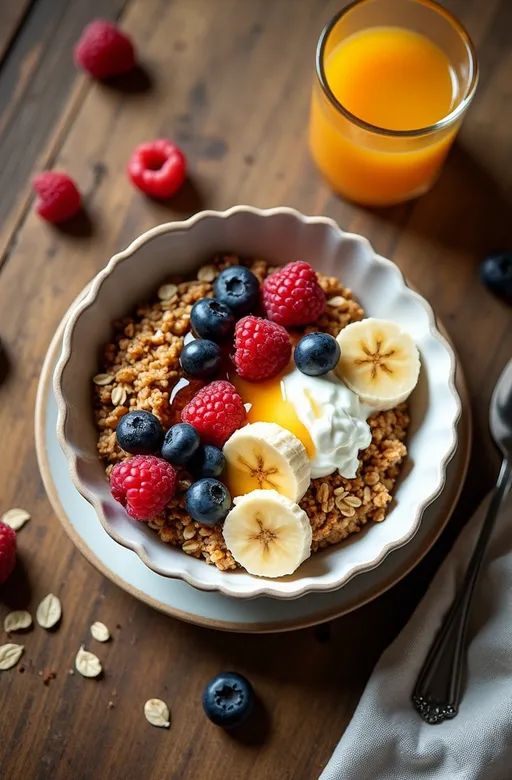
Overnight Oats Three Ways
Sometimes mornings are too hectic for even the simplest cooking. That’s where this GMA favorite comes in—prep it the night before, and breakfast is ready when you are.
Ingredients & Substitutions
Base Recipe (for each variation):
- 1/2 cup rolled oats (not quick oats or steel-cut)
- 1/2 cup milk of choice
- 1/4 cup Greek yogurt
- 1 tablespoon chia seeds
- 1 tablespoon maple syrup or honey
- Pinch of salt
For Apple Pie Variation:
- 1/2 apple, diced
- 1/4 teaspoon cinnamon
- 1 tablespoon chopped walnuts
- Dash of nutmeg
For Berry Bliss Variation:
- 1/3 cup mixed berries (fresh or frozen)
- 1 tablespoon almond butter
- 1/4 teaspoon vanilla extract
- Zest of 1/2 lemon
For Tropical Dream Variation:
- 1/4 cup diced pineapple
- 2 tablespoons toasted coconut flakes
- 1/4 teaspoon ground ginger
- 1 tablespoon chopped macadamia nuts
Old-fashioned rolled oats work best here—steel-cut are too crunchy when soaked, and quick oats turn mushy. For a protein boost, replace 2 tablespoons of oats with the same amount of hemp seeds. Greek yogurt can be substituted with plant-based versions, tho coconut yogurt tends to blend best with the flavors.
Step-by-Step Instructions
Combine the base ingredients in a jar or container with a tight-fitting lid. The most common mistake here is not adding enough liquid—the oats absorb more than you might expect. Stir well, making sure all dry ingredients are fully incorporated with no dry pockets lurking at the bottom.
Add ingredients for your chosen variation and stir again. Seal the container and refrigerate overnight or at least 6 hours. In the morning, give everything a good stir—if it seems too thick, add a splash of milk. Some people prefer warming their overnight oats for 30 seconds in the microwave, which works perfectly fine.
For the Apple Pie variation, consider quickly sautéing the diced apples with a bit of butter and cinnamon before adding—this softens them and intensifies the flavor. For frozen berries in the Berry Bliss version, add them frozen—they’ll thaw overnight and release juices that flavor the oats beautifully.
Cooking Techniques & Science
Overnight oats work through a process called hydration, where the liquid slowly penetrates the oats, softening them without heat. The chia seeds simultaneously undergo gelation, absorbing liquid and creating a pudding-like consistency that binds everything together.
The acid in the yogurt helps break down phytic acid in the oats, making nutrients more bioavailable. This is actually the same process that happens in traditional fermented porridges found across various cultures. Toasting nuts before adding enhances their flavor through the Maillard reaction, creating complex flavor compounds.
Serving & Pairing Suggestions
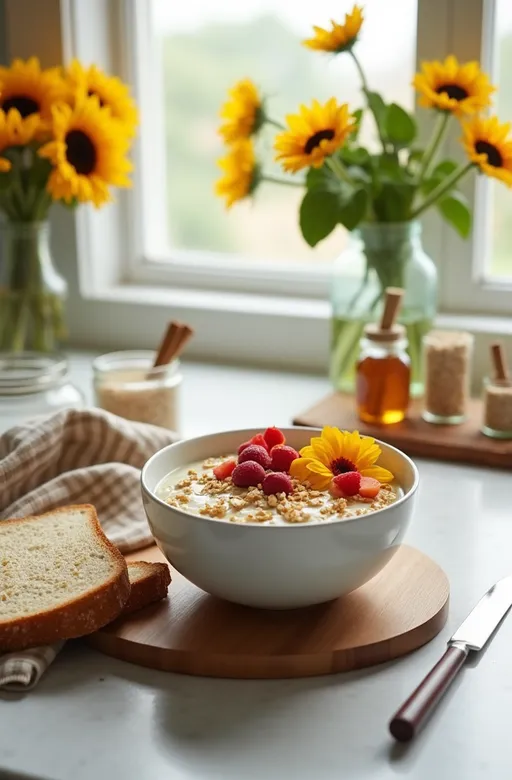
Overnight oats can be enjoyed straight from the refrigerator or gently warmed. Top with additional fresh fruit, a dollop of nut butter, or a sprinkle of granola for textural contrast. For presentation, layer ingredients in clear glasses to create a breakfast parfait effect.
These portable breakfasts pair wonderfully with hot beverages and can be transported to work or school. For extra nutrition, add a side of fresh fruit or a hard-boiled egg for additional protein.
Lunch: Midday Meals Made Easy

Mediterranean Grain Bowl
This GMA favorite brings together colorful vegetables, hearty grains, and protein in a satisfying lunch that won’t leave you in a 3 PM slump. It’s infinitely customizable and designed to keep well if prepared ahead.
Ingredients & Substitutions
- 1 cup cooked farro (substitute quinoa, brown rice, or barley)
- 1 cup chickpeas, rinsed and drained
- 1 Persian cucumber, diced
- 1 cup cherry tomatoes, halved
- 1/2 red onion, thinly sliced
- 1/2 cup kalamata olives, pitted and halved
- 1/2 cup crumbled feta cheese (substitute soft tofu seasoned with nutritional yeast for vegan option)
- 1/4 cup fresh parsley, chopped
- 2 tablespoons fresh mint, chopped
Dressing:
- 3 tablespoons extra virgin olive oil
- 1 tablespoon lemon juice
- 1 clove garlic, minced
- 1 teaspoon Dijon mustard
- 1/2 teaspoon dried oregano
- Salt and pepper to taste
Farro provides a nutty flavor and chewy texture, but any whole grain works well. For a protein boost, add grilled chicken or salmon, or keep it plant-based with marinated tempeh. Mediterranean ingredients are fairly flexible—swap in whatever vegetables are freshest or already in your fridge.
Step-by-Step Instructions
Cook your grain of choice according to package directions, adding a bay leaf and salt to the cooking water for enhanced flavor. While traditional recipes often skip this step, toasting the dry grains in a little olive oil before adding water develops a deeper, nuttier taste profile.
While the grain cooks, prepare vegetables and whisk together dressing ingredients in a small bowl. The garlic can be raw for a stronger flavor, or lightly sautéed for a mellower taste. For the onions, soaking sliced red onions in ice water for 10 minutes before adding to the bowl reduces their sharpness while maintaining crispness.
Combine the cooked grain (cooled slightly), chickpeas, and all vegetables in a large bowl. Drizzle with dressing and toss gently. Fold in herbs last to prevent bruising, and top with crumbled feta just before serving for the best presentation and texture.
Cooking Techniques & Science
This dish employs layering of flavors rather than complex cooking techniques. The acid in the lemon juice brightens the dish and helps cut through the richness of the olive oil and cheese. Letting the salad sit for 30 minutes before serving allows flavors to meld, as oil-soluble flavor compounds distribute throughout the dish.
The combination of legumes and grains creates a complete protein profile, making this a nutritionally balanced meal. The varied textures—chewy grains, creamy cheese, crisp vegetables—stimulate different sensory receptors for a more satisfying eating experience.
Serving & Pairing Suggestions
Serve at room temperature for best flavor. For a beautiful presentation, layer components rather than mixing: grains on the bottom, vegetables next, then chickpeas, herbs, and cheese on top. Drizzle with additional dressing just before serving.
This bowl pairs well with a crisp white wine like Pinot Grigio or a light rosé. For a complete lunch, add warm pita bread and a side of tzatziki sauce. For meal prep, store components separately and assemble just before eating.
Quick Chicken & Vegetable Soup
This GMA recipe takes classic chicken soup and streamlines it for busy weekdays without sacrificing flavor. It’s nourishing, adaptable, and perfect for batch cooking.
Ingredients & Substitutions
- 1 tablespoon olive oil
- 1 medium onion, diced
- 2 carrots, diced
- 2 celery stalks, diced
- 2 cloves garlic, minced
- 1 teaspoon dried thyme
- 1/2 teaspoon dried rosemary
- 6 cups low-sodium chicken broth
- 2 cups rotisserie chicken, shredded
- 1 cup frozen peas
- 1 zucchini, diced
- 2 tablespoons fresh lemon juice
- 2 tablespoons fresh parsley, chopped
- Salt and pepper to taste
Using rotisserie chicken is the time-saving hack that makes this soup weekday-friendly. For a vegetarian version, substitute chickpeas or white beans and vegetable broth. The vegetable combination is flexible—use what’s in season or what needs to be used up in your refrigerator.
Step-by-Step Instructions
Heat olive oil in a large pot over medium heat. Sauté onion, carrots, and celery until softened, about 5-7 minutes. This classic flavor base, known as mirepoix, develops foundational flavors for the soup. Add garlic and dried herbs, cooking just until fragrant, about 30 seconds—be careful not to burn the garlic, which turns bitter when overcooked.
Pour in chicken broth and bring to a simmer. Add shredded chicken and zucchini, simmering until zucchini is tender but not mushy, about 5 minutes. Stir in frozen peas during the last 2 minutes—they’ll cook quickly while maintaining their bright green color. Off heat, add lemon juice and fresh parsley.
The most common mistake is oversimmering, which dulls flavors and creates mushy vegetables. This quick soup relies on the quality of each component rather than long cooking times. For deeper flavor, use homemade stock if available, but a good quality store-bought broth works perfectly fine for weekday preparation.
Cooking Techniques & Science
This recipe uses the layering method of flavor building—starting with aromatic vegetables, then adding herbs, broth, protein, and finishing with acid and fresh herbs. Each component adds a different dimension to the final dish.
The acid from lemon juice, added at the end, brightens the entire soup and brings all flavors into focus. Adding it earlier would dull its impact due to heat exposure. Similarly, fresh herbs lose their volatile compounds when cooked too long, which is why they’re added at the end.
Serving & Pairing Suggestions
Serve hot with a slice of crusty bread or a simple green salad dressed with vinaigrette. For added texture, top with homemade croutons or a sprinkle of grated Parmesan cheese. Store leftovers in the refrigerator for up to 3 days, or freeze in individual portions for quick lunches.
This soup actually improves after a day in the refrigerator as flavors meld. For a more substantial meal, add cooked pasta or rice—but store separately and combine only when serving to prevent the grains from absorbing all the broth.
Dinner: Evening Meals to Impress
Sheet Pan Salmon with Roasted Vegetables
This GMA dinner solution combines elegant flavors with minimal cleanup—the definition of smart weeknight cooking. The technique of sheet pan cooking has revolutionized home dining, allowing for hands-off preparation with maximum flavor.
Ingredients & Substitutions
- 4 salmon fillets (about 6 oz each), skin-on
- 3 tablespoons olive oil, divided
- 2 tablespoons Dijon mustard
- 2 tablespoons maple syrup
- 2 cloves garlic, minced
- 1 tablespoon fresh thyme leaves
- 1 lemon, half juiced and half sliced
- 1 pound baby potatoes, halved
- 2 cups Brussels sprouts, trimmed and halved
- 1 red bell pepper, sliced
- 1 red onion, cut into wedges
- Salt and freshly ground pepper to taste
Wild-caught salmon provides the best flavor, but farm-raised works well too. For a more budget-friendly option, substitute trout or arctic char. The vegetable combination can be adjusted seasonally—swap in asparagus and peas in spring, or butternut squash and cauliflower in fall.
Step-by-Step Instructions
Preheat your oven to 425°F (220°C) and line a large baking sheet with parchment paper. This high temperature is crucial for proper caramelization of vegetables and quick cooking of the salmon. In a small bowl, combine 1 tablespoon olive oil, Dijon mustard, maple syrup, half the garlic, thyme, and lemon juice to create a glaze for the salmon.
Toss potatoes with 1 tablespoon olive oil, salt, and pepper. Roast for 15 minutes to get a head start, as they take longer than other components. Meanwhile, toss Brussels sprouts, bell pepper, and onion with remaining olive oil, garlic, salt, and pepper. After the initial potato roasting time, add the remaining vegetables to the pan, creating a space in the center for the salmon.
Pat salmon fillets dry (crucial for proper browning) and place skin-side down in the cleared space. Brush generously with the Dijon-maple glaze and top with lemon slices. Return the pan to the oven and roast for another 12-15 minutes, until salmon flakes easily and vegetables are tender and caramelized.
Cooking Techniques & Science
Sheet pan cooking utilizes the dry heat method, where food cooks by direct exposure to hot air. The high temperature causes the Maillard reaction—a complex chemical process that creates hundreds of new flavor compounds as proteins and sugars react under heat. This is what gives the caramelized edges of vegetables their distinctive sweet-savory flavor.
Cooking salmon skin-side down protects the delicate flesh from direct heat while allowing the skin to crisp. The natural fats in salmon baste the fish as they render, keeping it moist. The acidic components in the glaze (Dijon and lemon) help cut through the richness of the salmon while also partially denaturing proteins on the surface, allowing the glaze to adhere better.
Serving & Pairing Suggestions
Serve directly from the sheet pan for casual family dinners, or plate individually for a more elegant presentation. Garnish with additional fresh herbs (dill pairs beautifully with salmon) and lemon wedges. A dollop of crème fraîche or Greek yogurt mixed with herbs makes a simple, elegant sauce.
This dish pairs wonderfully with crisp white wines like Sauvignon Blanc or unoaked Chardonnay. For a complete meal, add a simple green salad with a light vinaigrette. Leftovers can be flaked into a grain bowl or salad the next day.
One-Pot Creamy Tuscan Chicken Pasta
This GMA fan-favorite combines protein, starch, and vegetables in one pot, creating a rich, satisfying meal with minimal cleanup. It’s fancy enough for company but simple enough for weeknights.
Ingredients & Substitutions
- 2 tablespoons olive oil
- 1.5 pounds boneless, skinless chicken breasts, cut into bite-sized pieces
- 1 teaspoon dried Italian seasoning
- 3 cloves garlic, minced
- 1 cup cherry tomatoes, halved
- 1/2 cup sun-dried tomatoes in oil, drained and chopped
- 4 cups low-sodium chicken broth
- 12 ounces fettuccine, broken in half
- 1/2 cup heavy cream
- 3 cups fresh spinach
- 1/2 cup grated Parmesan cheese, plus more for serving
- 1/4 cup fresh basil, chopped
- Salt and freshly ground black pepper to taste
- Red pepper flakes (optional)
For dietary modifications, substitute whole wheat pasta for additional fiber. plant-based cream alternatives work surprisingly well here, with cashew cream being the closest in richness. Chicken thighs can replace breasts for more flavor and moisture, tho they require slightly longer cooking.
Step-by-Step Instructions
Heat olive oil in a large, deep skillet or Dutch oven over medium-high heat. Season chicken pieces with salt, pepper, and Italian seasoning, then add to the hot oil. Sauté until golden brown on all sides but not completely cooked through, about 5 minutes. Many home cooks rush this step, but proper browning creates foundational flavor through the Maillard reaction.
Add garlic and cook until fragrant, about 30 seconds, then add cherry tomatoes and sun-dried tomatoes. Cook for 2 minutes until tomatoes begin to soften. Add chicken broth and bring to a boil. The broth should taste slightly saltier than you want the final dish, as the pasta will absorb some of the salt as it cooks.
Add pasta, ensuring it’s completely submerged in the liquid. Reduce heat to medium-low and simmer, stirring occasionally to prevent sticking, until pasta is al dente and most of the liquid is absorbed, about 10-12 minutes. The pasta releases starch as it cooks, naturally thickening the sauce.
Stir in heavy cream, spinach, and Parmesan cheese. Cook until spinach wilts and sauce thickens slightly, about 2 minutes. Remove from heat and stir in fresh basil. Let the dish rest for 5 minutes before serving—this allows the sauce to thicken to the perfect consistency.
Cooking Techniques & Science
This recipe employs the one-pot pasta method, where pasta cooks directly in the sauce rather than separately in water. This technique has several advantages: the pasta releases starch directly into the sauce, creating natural thickening; the pasta absorbs flavor as it cooks; and there’s only one pot to clean.
The combination of dairy fat (cream and cheese) with the starchy pasta water creates an emulsion that results in a silky, cohesive sauce. The addition of spinach right at the end preserves its nutrients and bright color, which would deteriorate with longer cooking.
Serving & Pairing Suggestions
Serve in wide, shallow bowls to showcase the colorful ingredients. Top with additional Parmesan, fresh basil, and a drizzle of high-quality olive oil. For an elevated presentation, add a few whole cherry tomatoes and a sprinkle of toasted pine nuts.
This hearty dish pairs beautifully with medium-bodied red wines like Chianti or Sangiovese. A simple arugula salad with lemon dressing provides a nice peppery contrast to the creamy pasta. For a complete Italian-inspired meal, add garlic bread or focaccia.
Dessert: Sweet Endings to Any Day

No-Bake Cheesecake Jars
This GMA dessert solution provides all the luxury of cheesecake without the fuss of baking or water baths. Individual portions make it perfect for entertaining or portion control.
Ingredients & Substitutions
For the crust:
- 1 cup graham cracker crumbs (about 8 full sheets)
- 3 tablespoons unsalted butter, melted
- 1 tablespoon granulated sugar
- Pinch of salt
For the filling:
- 16 oz cream cheese, softened (2 packages)
- 1/2 cup powdered sugar
- 1 teaspoon vanilla extract
- 1/2 teaspoon lemon zest
- 2 tablespoons lemon juice
- 1 cup heavy cream, chilled
- 2 tablespoons sour cream
For the topping:
- 2 cups mixed berries (strawberries, blueberries, raspberries)
- 2 tablespoons granulated sugar
- 1 tablespoon lemon juice
For a gluten-free option, substitute graham crackers with gluten-free cookies or toasted nuts processed with dates. Vegan adaptations work well with dairy-free cream cheese alternatives and coconut cream instead of heavy cream. The berry topping can be seasonal—try poached pears in fall or citrus segments in winter.
Step-by-Step Instructions
In a medium bowl, combine graham cracker crumbs, melted butter, sugar, and salt until the mixture resembles wet sand. Divide evenly among 6-8 small jars or glasses, pressing firmly to create an even base. Refrigerate while preparing the filling.
In a large bowl, beat softened cream cheese until smooth and fluffy, about 2 minutes. The texture here is crucial—cream cheese should be genuinely room temperature to avoid lumps. Add powdered sugar, vanilla, lemon zest, and juice, beating until well combined. In a separate bowl, whip heavy cream until stiff peaks form—don’t overwhip or it will turn buttery.
Fold whipped cream and sour cream into the cream cheese mixture using a gentle hand. Overmixing deflates the air bubbles that create the light, mousse-like texture. Spoon or pipe the filling into jars over the crust. Chill for at least 4 hours or overnight.
For the topping, combine berries with sugar and lemon juice in a small saucepan. Cook over medium heat until berries release their juices and just begin to break down, about 5 minutes. Cool completely before spooning over chilled cheesecakes.
Cooking Techniques & Science
This no-bake cheesecake relies on air incorporation rather than eggs for structure. Whipping introduces air bubbles into the heavy cream, creating a stable foam when properly chilled. The acid from lemon juice helps stabilize the mixture and balances the richness of the dairy.
The maceration process for the berry topping uses osmosis—sugar draws moisture from the fruit, creating a syrupy sauce without requiring cornstarch or other thickeners. The brief cooking breaks down cell walls in the fruit, releasing natural pectins that thicken the sauce as it cools.
Serving & Pairing Suggestions
Serve chilled, directly from the refrigerator. The individual jars make for an elegant presentation, especially when layered visibly through clear glass. For an interactive dessert bar, provide various toppings (berry compote, chocolate sauce, caramel, crushed cookies) and let guests customize their own.
These cheesecake jars pair beautifully with dessert wines like Moscato d’Asti or late-harvest Riesling. For a complete dessert course, serve alongside chocolate-dipped strawberries or small butter cookies.
Conclusion
Good Morning America recipes bring professional techniques and flavors into home kitchens without unnecessary complexity. The recipes showcased here demonstrate how thoughtful ingredient combinations, smart techniques, and time-saving hacks can elevate everyday cooking from mundane to memorable.
What sets these recipes apart is their flexibility—they’re designed to work with substitutions, adaptations, and whatever you have on hand. They represent cooking at its most practical yet inspiring, encouraging experimentation rather than rigid adherence to rules. That’s the real secret of good cooking—understanding the principles well enough to make them your own.
Whether you’re searching for a quick breakfast solution, a packable lunch, an impressive dinner, or a crowd-pleasing dessert, these GMA-inspired recipes provide a solid foundation for delicious meals any time of day. And isn’t that what good home cooking is all about? Creating food that nourishes both body and soul, bringing people together around the table with minimal stress and maximum enjoyment.
FAQs
Can I prepare the Mediterranean Grain Bowl ahead of time?
Yes, absolutely! The grain bowl components can be prepared up to 3 days ahead. Store the cooked grains, prepared vegetables, and dressing separately in airtight containers. Combine just before serving to maintain optimal texture and freshness. If planning to eat as leftovers, consider keeping tomatoes separate until serving, as they can become watery when stored.
How do I prevent the one-pot pasta from becoming too dry or too soupy?
The key is monitoring the liquid absorption rate of your specific pasta. Different brands and shapes absorb liquid differently. Start checking doneness around 8 minutes and adjust heat accordingly. If the pasta is still firm but liquid is running low, add 1/4 cup hot broth at a time. If it seems too soupy when pasta is done, increase heat slightly and cook uncovered for a few extra minutes, stirring frequently.
Can the no-bake cheesecake filling be frozen?
While you can freeze these cheesecake jars, the texture may change slightly upon thawing. For best results, freeze without the berry topping and add fresh topping after thawing. Allow frozen cheesecakes to thaw overnight in the refrigerator. The frozen version actually makes a delicious “semifreddo” type dessert when eaten only partially thawed!
My pancakes always seem to come out either too thick or too flat. What am I doing wrong?
Pancake consistency issues usually stem from batter thickness or leavening problems. For thick, cakey pancakes that don’t spread, your batter is too thick—add 1-2 tablespoons of milk to thin it out. For flat pancakes, your leavening agents might be old (replace after 6 months) or you’re overmixing (which deflates air bubbles). Also check your cooking temperature—too low and pancakes spread too much before setting.
How can I make these recipes work for various dietary restrictions?
Most GMA recipes are designed with flexibility in mind. For gluten-free options, use certified gluten-free grains and 1:1 gluten-free flour blends. For dairy-free adaptations, plant-based milks, yogurts, and cheeses generally work well, though you may need to adjust quantities slightly as they sometimes have different moisture contents. When reducing sodium, enhance flavor with herbs, spices, citrus zest, and vinegars instead of salt.

Veronica is a passionate food enthusiast with over three years of experience in exploring and writing about diverse cuisines. Her expertise lies in reviewing restaurants, sharing creative recipes, and discovering the latest food trends. As the voice behind FoodieRecap.com, Anju brings fresh perspectives and culinary insights to her audience.
