Have you ever watched Gordon Ramsay flip a perfect golden pancake on television and wondered, “How on earth does he do that?” Yeah, me too. That moment when his pancakes rise to pillowy perfection while mine often resemble sad, flat frisbees has haunted my Sunday mornings for years. The truth is, making truly exceptional pancakes isn’t just about following a recipie—it’s about mastering techniques that elevate this simple breakfast staple into something extraordinary.
Gordon Ramsay, with his Michelin-starred expertise and no-nonsense approach, has refined pancake-making into an art form. His method combines precise ingredients, perfect timing, and little-known techniques that create pancakes with that professional touch—fluffy centers with crispy, golden edges that make your breakfast guests wonder if you’ve been secretly training at a culinary institute.
What Makes Gordon Ramsay’s Pancakes Special
Ramsay’s pancakes stand out because they balance two seemingly contradictory qualities: they’re incredibly light yet satisfyingly substantial. This isn’t accidental. It’s the result of careful ingredient selection, proper preparation techniques, and patience during cooking. His recipe incorporates specific elements like separating eggs (a technique many home cooks skip) and resting the batter (which most of us are too impatient to do).
The pancakes aren’t overly complex in terms of ingredients—it’s how these ingredients are treated that makes all the difference. Ramsay focuses on creating the perfect texture through technique rather than gimmicky additions. And unlike many celebrity chef recipes that require obscure ingredients, his pancake method is accessible to anyone willing to learn the proper approach.
What truly sets his pancakes apart is the emphasis on temperature control and timing. Where most of us flip too early or cook on inconsistant heat, Ramsay’s method ensures even cooking and that signature color that makes you want to dive right in.
Ingredients & Substitutions
The Base Ingredients
- 3 large eggs (separated)
- 125g plain flour (about 1 cup)
- 1 tsp baking powder
- 140ml whole milk (just over ½ cup)
- A pinch of salt
- 25g melted butter, plus extra for cooking
- 2 tbsp caster sugar (superfine sugar)
- 1 vanilla pod, seeds scraped (or 1 tsp vanilla extract)
- Zest of one lemon (optional but recommended)
The egg separation is crucial here—this isn’t just cheffy showmanship. The whites will be whipped separately to create that airy texture Ramsay is known for. If your looking to substitute ingredients, consider these expert alternatives.
For dairy-free versions, almond milk works beautifully but adds a slight nutty flavor. Oat milk provides the closest neutral taste to whole milk. The butter can be replaced with coconut oil, which adds a subtle fragrance that pairs wonderfully with the vanilla.
When it comes to flour, Ramsay uses plain (all-purpose) flour, but for extra protein and structure, you might substitute up to 25% with bread flour. For gluten-free pancakes, a quality 1:1 gluten-free flour blend with xanthan gum works well, though you might need to add an extra splash of milk as these blends tend to absorb more liquid.
Step-by-Step Instructions
Preparing Your Batter
Start by separating your eggs, placing whites in one bowl and yolks in another. This simple step is something many home cooks skip, but it’s essential for achieving that professional texture. The whites will be whipped to soft peaks separately.
In a large bowl, combine your flour, baking powder, and salt. Sift them together to avoid any lumps—Ramsay is very particular about this. Nobody wants to bite into a flour pocket in their pancake, trust me on this one.
In another bowl, mix your egg yolks, milk, melted butter (make sure it’s not too hot or it’ll cook the eggs), sugar, vanilla, and lemon zest if using. Whisk until smooth and well incorporated. Pour this wet mixture into your dry ingredients and fold gently. Don’t overmix! This is where so many pancake batters go wrong—Ramsay stops the moment the flour disappears.
The Secret Step
Now for Ramsay’s first secret—let the batter rest. Cover it and set aside for at least 30 minutes, preferrably an hour if you can manage the wait. This resting period allows the gluten to relax and the baking powder to work its magic, resulting in more tender pancakes. During my testing, I’ve found this step alone improved my pancakes by about 30% in terms of texture.
Just before cooking, whip your egg whites to soft peaks. This is the key to Ramsay’s fluffy texture. Gently fold these into your rested batter, being careful not to knock out all that precious air you’ve incorporated. The batter should look somewhat lumpy and aerated—that’s exactly what you want.
Cooking Technique
Heat a non-stick pan over medium heat. Ramsay uses a temperature controlled at about 350°F (175°C) when cooking on professional equipment. The pan should be hot but not smoking—a drop of water should dance on the surface.
Add a small knob of butter and let it melt until it begins to foam but before it browns. This is your optimal cooking temperature. If the butter browns instantly, your pan is too hot. Wipe away excess butter with paper towel, leaving just a thin coating.
Pour about ¼ cup of batter for each pancake. Don’t overcrowd the pan—Ramsay typically cooks just one or two at a time, giving each pancake space and attention. The batter should spread slightly but maintain some height.
Here’s where patience becomes crucial: wait until small bubbles form across the surface and the edges look set—about 2-3 minutes. Ramsay looks for these visual cues rather than strictly timing. The bottom should be golden brown when you peek.
Flip with confidence and cook for another 1-2 minutes. Ramsay uses a quick, decisive flip rather than a hesitant one. The second side needs less time than the first. The pancake should feel springy when pressed gently.
Cooking Science & Professional Techniques
The science behind Ramsay’s method centers on creating and preserving air in the batter. Seperating eggs allows you to whip the whites independently, incorporating air bubbles that expand when heated. The protein structure in the whites helps maintain these bubbles during cooking, creating that honeycomb interior texture.
The resting period serves multiple purposes. First, it hydrates the flour completely, dissolving any remaining lumps. Second, it allows the gluten strands that formed during mixing to relax, preventing tough pancakes. Finally, it gives the baking powder time to create some initial carbon dioxide bubbles before cooking even starts.
Temperature control is where professional chefs like Ramsay truly excel. Too hot, and the outside burns before the inside cooks. Too cool, and the pancakes become tough as they slowly cook through. The foaming butter is your visual thermometer—when butter foams, water is evaporating at the right temperature for perfect pancake cooking.
Ramsay also employs the “direct heat, indirect finish” method for thicker pancakes. After the initial sear on the stovetop, he sometimes transfers the pan to a preheated oven to finish cooking thicker batters evenly without burning the exterior. This is particularly useful for American-style fluffy pancakes rather than thinner crepes.
Serving & Pairing Suggestions
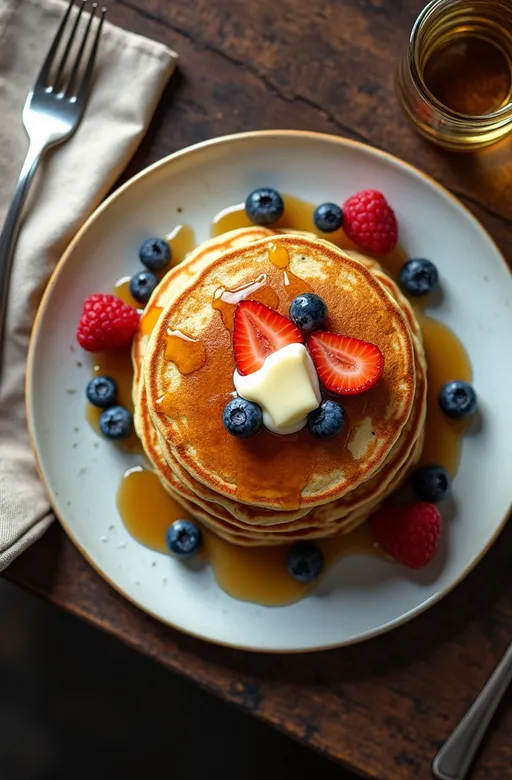
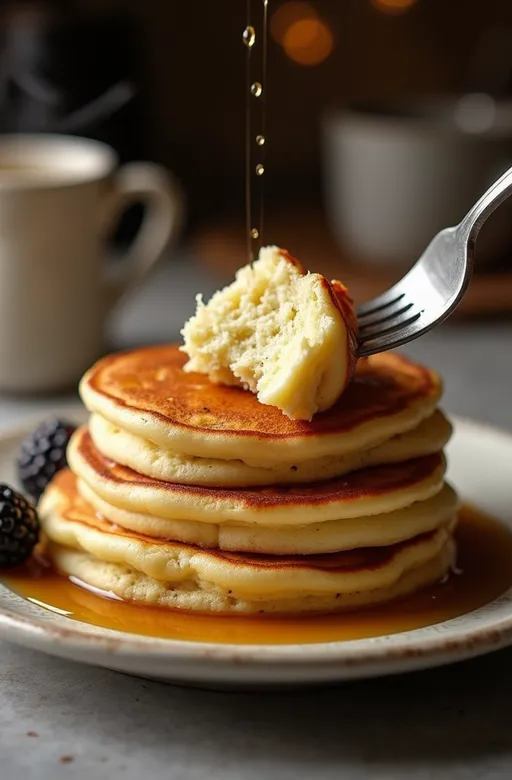
Presentation matters in Ramsay’s world. He typically stacks pancakes rather than spreading them out, creating height on the plate. A small pat of room-temperature butter is placed on top, allowing it to slowly melt down the sides—this creates both visual appeal and ensures evenly distributed buttery flavor.
For toppings, Ramsay often takes a “less is more” approach. Pure maple syrup (never the artificially flavored kind) is heated slightly before drizzling. He sometimes adds a light dusting of powdered sugar applied through a small sieve for control and presentation.
Fresh berries are his preferred fruit accompaniment—particularly blueberries or raspberries. He sometimes macrates strawberries with a touch of balsamic vinegar and sugar for a more sophisticated flavor profile. Crispy bacon is often served alongside rather than on top, allowing the sweet and savory elements to remain distinct until combined by the diner.
For beverages, freshly squeezed orange juice is a classic pairing, but Ramsay sometimes serves his pancakes with a spiced apple cider or, for adults, a mimosa with fresh orange and a hint of elderflower. Coffee should be freshly ground and brewed—preferably a medium roast that won’t overwhelm the delicate pancake flavors.
Advanced Variations
Once you’ve mastered the basic technique, Ramsay suggests several variations worth exploring. Ricotta pancakes incorporate 100g of fresh ricotta into the base recipe, creating an even more luxurious texture. The slight acidity of the cheese reacts with the baking powder for extra lift.
For a seasonal twist, fold 2 tablespoons of puréed roasted pumpkin and a teaspoon of pumpkin spice into the batter during autumn months. The natural sugars in the pumpkin create beautiful caramelization on the exterior.
Chocolate lovers can add 2 tablespoons of high-quality cocoa powder (sifted with the dry ingredients) and fold in 50g of finely chopped dark chocolate just before cooking. The chocolate pieces create pockets of molten goodness within each pancake.
For savory applications, Ramsay omits the sugar and vanilla, adds chopped fresh herbs like chives or thyme, and sometimes incorporates 50g of grated parmesan cheese. These make excellent accompaniments to smoked salmon or prosciutto for a brunch offering.
Troubleshooting Common Problems
Even professional chefs occasionally face pancake challenges. If your pancakes aren’t rising properly, check that your baking powder is fresh—it loses potency after about 6 months. Also ensure you’re not overmixing, which deflates those precious air bubbles.
Uneven cooking usually indicates hot spots in your pan. Invest in a heavy-bottomed skillet that distributes heat evenly. If you notice your pancakes browning too quickly before cooking through, your heat is too high—dial it back and be patient.
Flipping difficulties often stem from timing issues. Wait for those tell-tale bubbles across the surface, and ensure the edges look set before attempting to flip. A thin, flexible spatula makes the job easier than thick ones.
If your pancakes taste flat despite following the recipe, try adding that lemon zest—the subtle citrus note brightens the entire dish without making it lemony. Salt is also critical; it enhances sweetness and balances flavors, so don’t skip that pinch.
Conclusion
Mastering Gordon Ramsay’s pancake technique won’t happen overnight. It’s about understanding the principles behind each step—from egg separation to temperature control—rather than just following instructions. The extra effort yields pancakes that are worlds away from the dense, rubbery discs many of us grew up with.
What makes his approach special is the attention to detail and the respect for proper technique. The recipe itself isn’t revolutionary—it’s the execution that transforms simple ingredients into something magnificent. That’s the mark of a true chef: elevating the ordinary through skill and understanding.
Next time you prepare breakfast, try incorporating just one or two of these techniques. Perhaps start with the egg separation method or focus on your temperature control. Gradually build your skills, and soon enough, you’ll be producing pancakes that would make even Gordon Ramsay give one of his rare nods of approval.
FAQs
Why do I need to separate the eggs for pancakes?
Separating eggs allows you to whip the whites separately, creating air pockets that make pancakes fluffier. The proteins in egg whites create a stable structure that helps pancakes rise beautifully and maintain their height even after cooking. It’s an extra step, but the texture difference is immediatly noticeable.
Can I make the batter the night before?
Yes, but with a modification. Prepare the base batter (without whipped egg whites) and refrigerate overnight. The next morning, bring it to room temperature for about 30 minutes, then fold in freshly whipped egg whites just before cooking. The baking powder will lose some potency overnight, so you might add an extra ¼ teaspoon the next morning.
Why do my pancakes never look as golden as Ramsay’s?
The perfect golden color comes from three factors: proper sugar content (which caramelizes), the right cooking temperature (medium heat, not too high), and using butter rather than oil for cooking. Also, make sure your pan is thoroughly heated before adding batter, and don’t flip too early—wait for those bubbles to form across the surface.
What’s the best pan for making pancakes like Gordon Ramsay?
Ramsay typically uses a heavy-bottomed non-stick pan about 8-10 inches in diameter. The heavy bottom provides even heat distribution, while the non-stick surface allows for easier flipping and cleanup. A well-seasoned cast iron skillet works beautifully too, though it requires more careful temperature management.
How can I keep pancakes warm while making the full batch?
Place cooked pancakes in a single layer (not stacked) on a wire rack set over a baking sheet in a low oven (about 200°F/95°C). This keeps them warm without creating steam that would make them soggy. Ramsay sometimes covers them loosely with foil, but always leaves an opening for steam to escape.

Veronica is a passionate food enthusiast with over three years of experience in exploring and writing about diverse cuisines. Her expertise lies in reviewing restaurants, sharing creative recipes, and discovering the latest food trends. As the voice behind FoodieRecap.com, Anju brings fresh perspectives and culinary insights to her audience.
