Three years ago, I was struggling through another late service at my restaurant when our sous chef whipped up what she called her “emergency bowl” for the staff meal. Ground beef sizzling in a sweet-savory sauce, spooned over steaming rice with crisp vegetables on the side. That first bite stopped me mid-complaint about the brutal dinner rush.
This wasn’t just comfort food—it was genius disguised as simplicity.
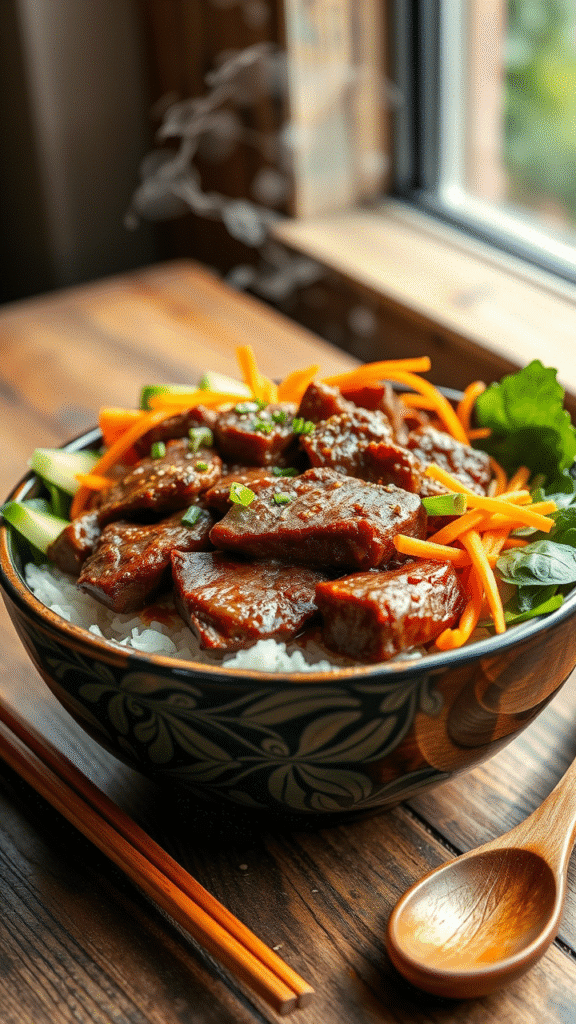
The Korean ground beef bowl, or what many call “Korean beef bowls,” represents everything beautiful about Korean home cooking. It takes the complex flavors of traditional bulgogi and makes them accessible through affordable ground beef. The result is a dish that delivers restaurant-quality satisfaction in under twenty minutes.
What makes this bowl truly special isn’t just its speed or economy. It’s how the technique of caramelizing ground beef with Korean pantry staples creates layers of umami that would make any bulgogi jealous. The sauce penetrates every grain of meat while developing those coveted crispy edges that stick to your pan—and your memory.
Understanding the Foundation: Ingredients That Make Magic
The Protein: Choosing Your Ground Beef
Ground beef with 80/20 fat ratio works best here, though 85/15 will do if you’re watching calories. The fat content isn’t just about flavor—it’s about texture. Leaner beef tends to steam rather than caramelize, robbing you of those golden-brown bits that make this dish sing.
For substitutions, ground turkey works surprisingly well, though you’ll want to add a tablespoon of neutral oil to compensate for the lower fat content. Ground pork creates an even richer version that pairs beautifully with kimchi. Some of my Korean colleagues swear by mixing half beef, half pork for what they call the “perfect blend.”
Avoid pre-seasoned ground meats entirely. They interfere with the delicate balance of the sauce and often contain additives that prevent proper browning.
The Sauce Symphony: Building Umami Layers
The sauce starts with soy sauce—but not just any soy sauce. Korean dark soy sauce (jin ganjang) offers deeper complexity than Japanese varieties, though Kikkoman works fine in a pinch. You’ll need about 1/4 cup for one pound of beef.
Brown sugar creates the characteristic caramelization that makes Korean beef bowls irresistible. Muscovado or coconut sugar add subtle molasses notes, but regular brown sugar works perfectly. The key is using enough—about 2 tablespoons—to balance the saltiness and create those glossy, lacquered edges on the meat.
Sesame oil acts as the aromatic backbone. Just one tablespoon transforms the entire dish, but timing matters. Add it too early and you’ll cook out the nutty fragrance. Too late, and it won’t integrate properly.
Fresh garlic and ginger form the aromatic base, with a 2:1 ratio working best. Grate them rather than mincing for better distribution and a smoother sauce consistency. Pre-minced versions from jars lack the punch you need here.
The Supporting Cast: Vegetables and Garnishes
Green onions deserve special attention in this dish. The white parts go into the cooking process for sweetness, while the green parts finish the bowl with fresh bite and color. Korean markets often sell thicker scallions that hold up better to cooking, but regular green onions work fine.
Carrots add subtle sweetness and satisfying crunch. Julienne them thin—about matchstick size—so they cook quickly without becoming mushy. Red bell peppers provide color and mild sweetness, though yellow or orange varieties work equally well.
For heat, gochugaru (Korean red pepper flakes) offers the most authentic flavor profile. It’s milder and smokier than standard red pepper flakes, with a beautiful color that doesn’t fade during cooking. Start with 1/2 teaspoon and adjust to taste.
Mastering the Technique: Step-by-Step Excellence

The Foundation: Rice Preparation
Start your rice first—this seems obvious, but timing matters more than you’d think. Korean short-grain rice provides the ideal texture for this bowl, with enough starch to absorb the sauce without becoming mushy. Rinse it until the water runs clear, then use a 1:1.2 ratio of rice to water.
If you’re using a rice cooker, this is straightforward. For stovetop cooking, bring the water to a boil, add rice, reduce heat to lowest setting, cover, and cook for 18 minutes. Let it rest off heat for 10 minutes before fluffing.
Day-old rice actually works better than fresh for this application. It’s drier and won’t get soggy when you add the saucy beef on top.
The Protein: Achieving Perfect Caramelization
Heat your pan over medium-high heat until it’s properly hot—a drop of water should sizzle and evaporate immediately. Add the ground beef without oil initially. The fat will render and provide cooking medium.
Break up the meat with a wooden spoon, but don’t overwork it. You want some larger chunks for texture variation. Cook without stirring for about 3-4 minutes to develop the first layer of browning.
Here’s where most home cooks go wrong: they stir too early. Let the beef develop that golden crust before breaking it up further. The sound should be a steady sizzle, not a bubbling boil. If it’s bubbling, your heat is too low and the meat is steaming rather than browning.
Once you’ve achieved good color on the first side, break up the larger pieces and let them brown again. This double-browning technique creates multiple layers of flavor that separate restaurant-quality results from home cooking disasters.
The Sauce Integration: Timing Is Everything
When the beef is properly browned, create a well in the center of the pan. Add minced garlic and ginger to this well, cooking for about 30 seconds until fragrant. This technique prevents burning while ensuring even distribution.
Add the soy sauce and brown sugar mixture next. The pan will hiss and steam dramatically—this is normal. The sugars will start caramelizing immediately, creating that glossy coating that makes Korean beef bowls so visually appealing.
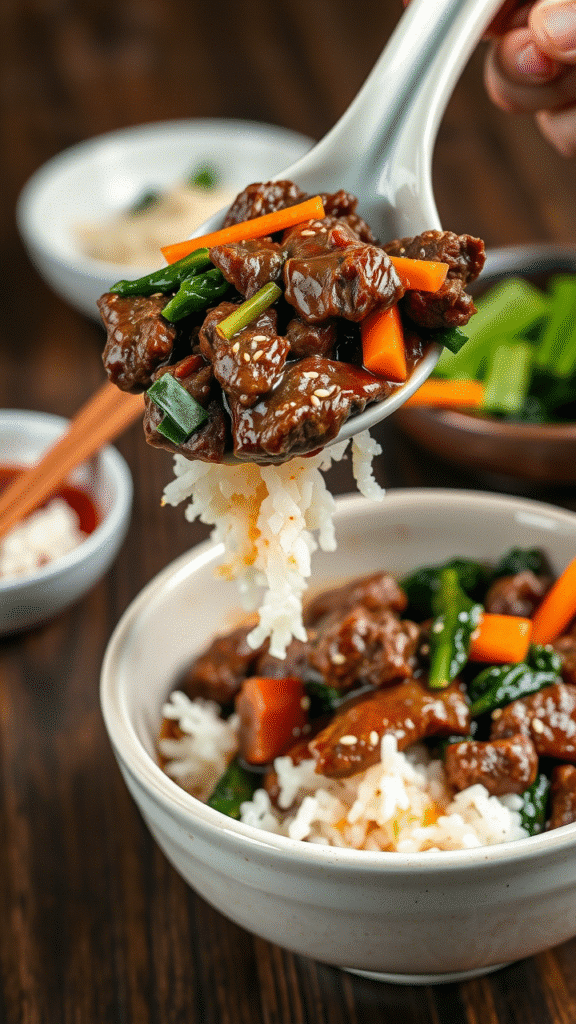
Stir constantly for about 2 minutes as the sauce reduces and coats the meat. You’re looking for a glossy, almost lacquered appearance. The sauce should cling to each piece of beef rather than pooling in the pan.
Add sesame oil last, stirring it in off the heat. This preserves the aromatic compounds that make sesame oil so distinctive in Korean cooking.
The Vegetable Component: Maintaining Texture
In a separate pan (or the same pan after removing the beef), quickly stir-fry your julienned vegetables. High heat and constant motion are key here. You want them tender-crisp, not soft.
Carrots go in first since they take longest to cook. After about 2 minutes, add bell peppers. The entire vegetable cooking process should take no more than 4-5 minutes total.
Season lightly with salt and a splash of soy sauce. The vegetables should complement, not compete with, the richly flavored beef.
The Science Behind the Flavor: Understanding Korean Cooking Principles

The Maillard Reaction: Why Browning Matters
The deep, complex flavors in Korean ground beef bowls come primarily from the Maillard reaction—the chemical process that occurs when proteins and sugars are heated together. This reaction creates hundreds of new flavor compounds that give the dish its characteristic savory-sweet profile.
The brown sugar in the sauce accelerates this process while adding its own caramelized notes. The key is maintaining high enough heat to promote browning while not burning the sugars. This balance separates professional results from amateur cooking.
Umami Layering: The Korean Approach
Korean cuisine excels at building umami through layering rather than single strong flavors. In this dish, soy sauce provides glutamates, the browned beef contributes inosinates, and the sesame oil adds aromatic compounds that enhance perception of these savory elements.
The garlic and ginger contribute sulfur compounds that bridge these flavors while adding their own complexity. This multi-faceted approach to flavor building is why Korean dishes taste so much more complex than their simple ingredient lists might suggest.
Heat Distribution: Pan Selection and Technique
A well-seasoned carbon steel or cast iron pan works best for this dish. These surfaces retain heat well and develop better browning than nonstick surfaces. The thermal mass helps maintain high temperatures when you add the cold ground beef.
If you only have nonstick pans, increase the heat slightly to compensate for the lower heat retention. Just watch carefully to prevent the sugars from burning.
Serving and Presentation: Making It Restaurant-Worthy
Plating Techniques That Impress
Start with a generous portion of warm rice in your bowl—about 3/4 cup per serving. Create a slight well in the center using the back of a spoon. This well will hold the beef and prevent the sauce from running off.
Spoon the hot beef mixture over the rice, allowing some sauce to seep into the rice while maintaining the meat’s position on top. The contrast between the glossy brown beef and the white rice creates immediate visual appeal.
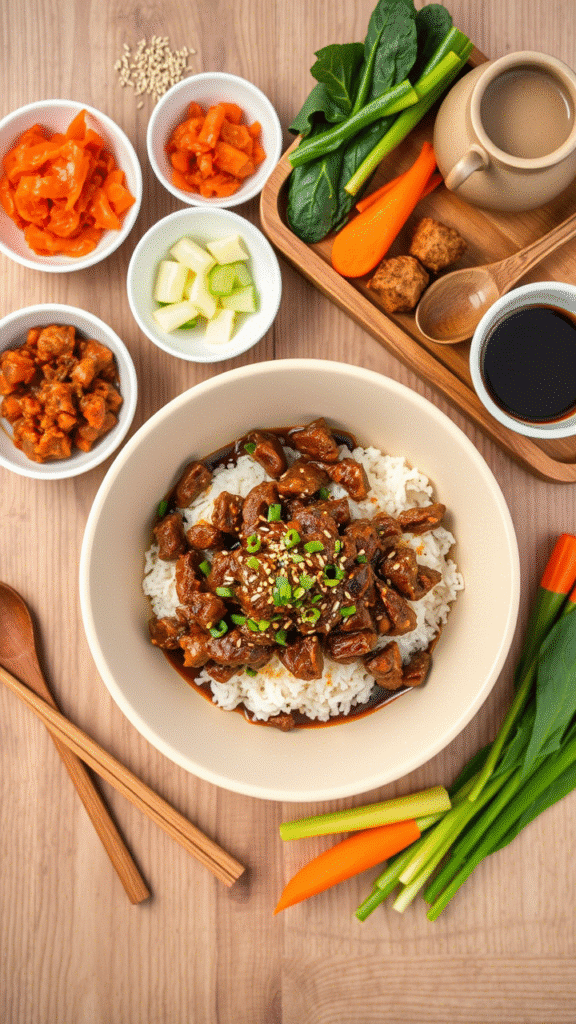
Arrange the stir-fried vegetables around the edges of the bowl, creating color contrast and visual interest. The vegetables shouldn’t cover the beef but should frame it attractively.
Garnishing for Maximum Impact
Fresh chopped green onions provide the most important garnish—their bright color and fresh bite cut through the rich meat beautifully. Sprinkle them generously over the entire bowl.
Toasted sesame seeds add textural interest and reinforce the sesame flavor in the dish. Toast them yourself in a dry pan for better flavor than pre-toasted versions.
A sprinkle of gochugaru adds color and mild heat, while also signaling the dish’s Korean heritage to your diners.
Temperature and Timing
Serve immediately while everything is hot. The contrast between the warm, saucy beef and the steaming rice is part of the dish’s appeal. Korean earthenware bowls (if you have them) retain heat better than regular ceramic bowls.
Pre-warm your serving bowls in a 200°F oven for a few minutes before plating. This simple step keeps the food at optimal temperature longer.
Pairing Suggestions: Creating a Complete Korean Experience
Traditional Banchan Accompaniments
Kimchi is the classic accompaniment to Korean beef bowls. Its acidity and heat provide perfect counterpoint to the rich, sweet beef. If you don’t have homemade kimchi, buy it from a Korean market rather than regular grocery stores—the flavor difference is dramatic.
Pickled radish (danmuji) offers another acidic element with a different texture profile. The crunch contrasts beautifully with the soft rice and tender beef.
Bean sprout salad (kongnamul) provides fresh, clean flavors that cleanse the palate between bites of the rich beef.
Beverage Pairings
Korean barley tea (boricha) is traditional and cuts through the richness beautifully. Serve it cold for contrast with the hot bowl.
For alcohol, Korean beer like Hite or Cass provides clean, crisp refreshment. Soju cocktails with citrus also work well, though they’re less traditional.
Green tea offers a classic pairing that won’t compete with the complex flavors in the bowl.
Professional Tips and Troubleshooting

Common Mistakes and Solutions
Problem: Beef turns out tough and chewy Solution: Don’t overcook, and make sure your heat is high enough for proper browning rather than steaming
Problem: Sauce is too salty Solution: Add more brown sugar to balance, or serve over extra rice to dilute
Problem: Vegetables are mushy Solution: Cook them separately and add them at the end, or cut them larger so they retain texture
Problem: Dish lacks depth of flavor Solution: Make sure you’re browning the beef properly—this is where most of the flavor develops
Make-Ahead Strategies
The beef mixture actually improves when made a day ahead and reheated. The flavors meld and deepen overnight. Store it refrigerated and reheat gently, adding a splash of water if needed to loosen the sauce.
Rice can be cooked ahead and reheated in the microwave with a damp paper towel over it. This technique restores moisture and prevents drying out.
The vegetables should be cooked fresh for best texture, but you can prep them (wash, cut) up to a day ahead.
Scaling for Larger Groups
This recipe doubles or triples easily, but cook in batches rather than overcrowding your pan. Overcrowding prevents proper browning and leads to steamed, gray meat instead of caramelized perfection.
For really large groups, consider using a large wok or even finishing the dish in the oven after browning. Just make sure to stir occasionally to prevent burning.
Creative Variations and Professional Adaptations
Protein Variations
Ground turkey creates a lighter version that’s popular with health-conscious diners. Add extra sesame oil and a touch of fish sauce to boost umami.
Ground lamb makes an interesting fusion version with Middle Eastern influences. The stronger flavor pairs well with the Korean seasonings.
For a luxury version, use chopped ribeye or short rib instead of ground beef. The cooking method remains the same, but the flavor becomes incredibly rich.
Regional Adaptations
Adding gochujang (Korean chili paste) creates a spicier, more complex version popular in certain regions. Start with 1 tablespoon mixed into the sauce.
Some areas add thinly sliced shiitake mushrooms for extra umami. Cook them with the vegetables for best results.
A handful of fresh spinach wilted into the hot beef at the end adds color and nutrition without changing the fundamental character of the dish.
Modern Interpretations
Korean beef lettuce wraps using the same meat mixture appeal to low-carb diners. Serve with butter lettuce or Korean ssam leaves.
Korean beef bowls over cauliflower rice cater to keto dieters while maintaining the essential flavors.
Adding a fried egg on top turns it into a more substantial meal and adds richness that pairs beautifully with the beef.
The Korean ground beef bowl represents everything I love about professional cooking: simple techniques that create complex flavors, affordable ingredients transformed into something special, and the satisfaction of feeding people food that makes them happy. Master this dish, and you’ll understand why Korean home cooking has conquered kitchens worldwide.
The key lies not in exotic ingredients or complicated techniques, but in understanding how heat, timing, and balance work together to create something greater than the sum of its parts. When you see that glossy, caramelized beef coating perfectly seasoned rice, with bright vegetables adding color and texture, you’ll know you’ve created something special.
Remember: the best Korean beef bowls come from patience with the browning process, quality ingredients, and proper timing. Don’t rush the caramelization, don’t skip the garnishes, and don’t forget that cooking is as much about the love you put into it as the techniques you use.
Frequently Asked Questions?
Can I make this dish ahead of time?
Yes, the beef mixture actually improves when made a day ahead. The flavors deepen and meld beautifully overnight. Store it refrigerated and reheat gently with a splash of water if needed. Cook the rice and vegetables fresh for best texture, though rice can be reheated successfully.
What can I substitute for Korean ingredients I can’t find?
Regular soy sauce works instead of Korean soy sauce, though the flavor will be slightly different. If you can’t find gochugaru, use paprika mixed with a tiny amount of cayenne for color and mild heat. Sesame oil is crucial and shouldn’t be substituted, but it’s available in most grocery stores now.
Why does my ground beef turn out gray and bland?
This usually means your pan wasn’t hot enough or you stirred too early. The beef needs to develop a proper brown crust before you break it up. Make sure you hear steady sizzling, not bubbling, and let it sit undisturbed for 3-4 minutes before stirring.
Can I use ground turkey or chicken instead?
Absolutely! Ground turkey works especially well, though you’ll want to add a tablespoon of oil since it’s leaner than beef. Ground chicken is milder and may need extra seasonings. Both alternatives create lighter versions while maintaining the essential character of the dish.
How spicy is this dish, and can I adjust the heat level?
The basic recipe is quite mild—most of the heat comes from the optional gochugaru garnish. For more heat, add gochujang (Korean chili paste) to the sauce, starting with 1 tablespoon. For less heat, simply omit the gochugaru. The dish is very adaptable to different spice preferences.

Veronica is a passionate food enthusiast with over three years of experience in exploring and writing about diverse cuisines. Her expertise lies in reviewing restaurants, sharing creative recipes, and discovering the latest food trends. As the voice behind FoodieRecap.com, Anju brings fresh perspectives and culinary insights to her audience.
