The first time I attempted a triple chocolate cheesecake, my kitchen looked like a cocoa bomb had exploded. Chocolate smeared across my apron, countertops dusted with powdered sugar, and somehow, even my eyebrows weren’t spared. But that first bite—that moment when the silky chocolate melted on my tongue—made every messy moment worthwhile. There’s something almost magical about the combination of chocolate and cheesecake that elevates both components to extraordinary heights.
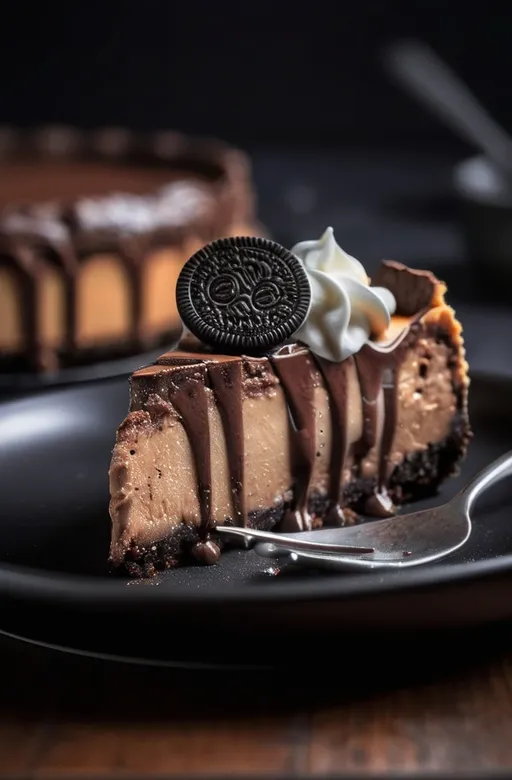
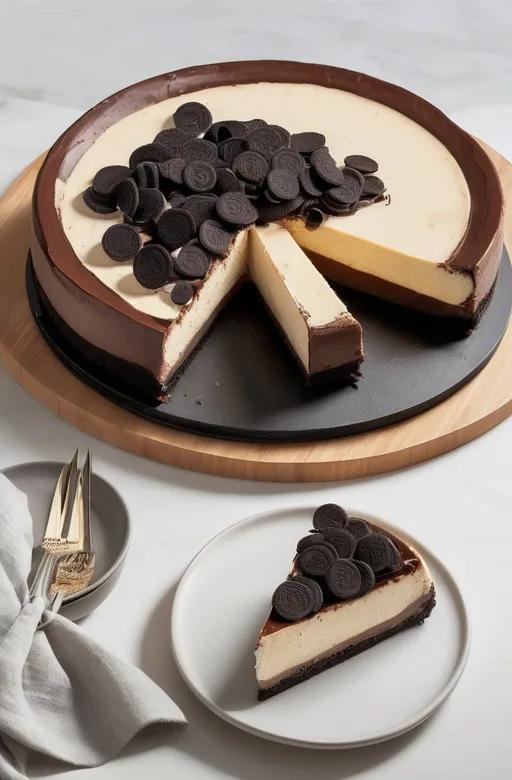
Triple chocolate cheesecake isn’t just another dessert; it’s a celebration on a plate. This particular recipe features a crunchy Oreo crust, a velvety chocolate cheesecake filling, and dual chocolate ganache toppings that create a symphony of textures and intensities. What makes this version special is the careful balance of three distinct chocolate layers that complement rather than compete with one another.
Ingredients & Substitutions for Triple Chocolate Cheesecake

For the Oreo Crust:
- 24 Oreo cookies (about 2 cups when crushed)
- 5 tablespoons unsalted butter, melted
- Pinch of salt
The iconic sandwich cookies create a perfect foundation for our cheesecake. Don’t waste time scraping out the filling—use the whole cookie, cream center and all. The filling actually helps bind the crust together. If Oreos aren’t available, any chocolate sandwich cookie will work, though the distinctive Oreo flavor is hard to replicate. For those avoiding palm oil (found in commercial sandwich cookies), substitute 1½ cups chocolate graham cracker crumbs mixed with 2 tablespoons of sugar.
For the Chocolate Cheesecake Filling:
- 24 ounces (3 blocks) full-fat cream cheese, room temperature
- 1 cup granulated sugar
- 3 large eggs, room temperature
- 8 ounces semi-sweet chocolate, melted and slightly cooled
- ¼ cup Dutch-processed cocoa powder, sifted
- 2 teaspoons vanilla extract
- ½ cup sour cream, room temperature
- Pinch of espresso powder (optional but recommended)
Room temperature ingredients are non-negotiable for achieving that perfect, lump-free texture. Trust me, I learned the hard way. Cold cream cheese is the enemy of silky cheesecake. Neufchâtel cheese (⅓ less fat) can replace standard cream cheese, but the texture won’t be quite as rich. The espresso powder doesn’t add coffee flavor—it intensifies the chocolate depth, similar to how salt enhances savory dishes.
For the Milk Chocolate Ganache Layer:
- 4 ounces milk chocolate, chopped
- ¼ cup heavy cream
- 1 tablespoon unsalted butter
This middle layer provides a creamy counterpoint to the more intense dark chocolate topping. Choose a high-quality milk chocolate with at least 30% cacao for best results. White chocolate can be substitued for a striking visual contrast, though the flavor profile will shift significantly.
For the Dark Chocolate Ganache Topping:
- 6 ounces dark chocolate (60-70% cacao), chopped
- ½ cup heavy cream
- 1 tablespoon corn syrup (optional, for shine)
- Chocolate curls or shavings for garnish (optional)
The final crowning glory brings intensity and sophistication. The corn syrup creates that professional bakery-case shine, but you can skip it if you’d prefer. For those who find dark chocolate too bitter, semi-sweet (around 55% cacao) works beautifully as well.
Step-by-Step Instructions for Perfect Chocolate Cheesecake

Preparing the Oreo Crust:
- Preheat your oven to 350°F (175°C) and position the rack in the lower third of the oven. This positioning helps prevent the top from browning too quickly.
- Pulse Oreo cookies in a food processor until they reach a fine, sandy consistency—about 30 seconds of processing should do it. No food processor? Place cookies in a ziplock bag and crush them with a rolling pin, though you’ll need some elbow grease to get them fine enough.
- Combine the crushed cookies with melted butter and salt in a bowl, mixing until it resembles wet sand. Press the mixture firmly into the bottom and slightly up the sides of a 9-inch springform pan. I like using the bottom of a measuring cup for this—it creates an even, compact layer that holds together when sliced.
The crust should be baked for about 8-10 minutes, then cooled completely. Some recipes skip the pre-baking step, but I find it creates a more sturdy, crisp foundation that contrasts beautifully with the creamy filling. Plus, it prevents that soggy bottom we all dread.
Creating the Chocolate Cheesecake Filling:
- Reduce the oven temperature to 325°F (165°C). Meanwhile, beat cream cheese with an electric mixer on medium-low speed until completely smooth, about 2 minutes. Scrape down the sides of the bowl frequently—this isn’t just fussy chef behavior; it’s crucial for avoiding lumps in your final product.
- Add sugar gradually and continue beating until incorporated and smooth. Don’t rush this step by dumping all the sugar in at once; gradual addition creates a better texture.
- Add eggs one at a time, beating just until each is incorporated. Overbeating after adding eggs can incorporate too much air, which leads to cracks during baking. I’ve ruined more than one cheesecake by getting distracted during this step.
- Slowly blend in the melted chocolate, cocoa powder, vanilla extract, sour cream, and espresso powder (if using). Mix just until combined and no streaks remain. The batter should be smooth, glossy, and fairly thick.
I once forgot to sift my cocoa powder and ended up with annoying little cocoa lumps throughout my cheesecake. Learn from my mistake—the sifting step isn’t optional if you want that perfectly smooth texture.
Baking the Cheesecake:
- Wrap the outside of your springform pan with a double layer of aluminum foil, making sure it comes up the sides to prevent water from seeping in. Pour the cheesecake filling onto the cooled crust and smooth the top with a spatula.
- Place the springform pan in a larger roasting pan and add enough hot water to come about 1 inch up the sides of the springform pan, creating a water bath (bain-marie). This method prevents cracking by providing gentle, even heat and adding moisture to the oven environment.
- Bake for 60-70 minutes, or until the edges are set but the center still has a slight jiggle when the pan is gently shaken. It should move as one unit, not like liquid. Turn off the oven, crack the door open about an inch, and let the cheesecake cool in the oven for 1 hour.
The most common mistake I see is overbaking. Remember, the cheesecake continues to cook and set as it cools. That slight jiggle in the center is your friend, not your enemy. If you wait until it’s completely firm in the center, you’ve gone too far.
Preparing the Milk Chocolate Ganache Layer:

- Once the cheesecake has cooled in the oven for an hour, remove it from the water bath and place it on a cooling rack. Run a thin knife around the edge of the cheesecake to loosen it from the pan, but don’t remove the springform ring yet.
- For the milk chocolate ganache, place the chopped chocolate in a heatproof bowl. Heat the heavy cream in a small saucepan until it just begins to simmer (small bubbles appear around the edges), then pour it over the chocolate. Let it sit for 2 minutes, then add the butter and stir until smooth and glossy.
- Pour the milk chocolate ganache over the cheesecake, tilting the pan gently to create an even layer. Refrigerate for at least 1 hour to set this layer before adding the dark chocolate topping.
The key to perfect ganache is patience. Don’t rush the melting process by stirring too soon, and avoid overheating the cream. Simmering rather than boiling protects the delicate flavor compounds in the chocolate from breaking down.
Creating the Dark Chocolate Ganache Topping:
- Prepare the dark chocolate ganache similarly: place the chopped dark chocolate in a bowl, heat the cream until simmering, then pour over the chocolate. After 2 minutes, stir until smooth, adding the corn syrup if using.
- Let the ganache cool slightly (about 10 minutes) before pouring over the set milk chocolate layer. The slight cooling prevents it from melting the milk chocolate layer beneath. Return the cheesecake to the refrigerator for at least 4 hours, preferably overnight.
- Before serving, carefully remove the springform ring. For the cleanest cuts, dip your knife in hot water, wipe it dry, then slice. Repeat this process between each cut. Garnish with chocolate curls or shavings if desired.
The overnight refrigeration isn’t just a suggestion—it’s essential for flavor development. All those complex chocolate notes need time to meld and mature. Your patience will be rewarded with an infinitely more flavorful result.
Cooking Techniques & Science of Chocolate Cheesecake
Understanding the science behind cheesecake will elevate your baking from good to exceptional. The structure of cheesecake comes primarily from the proteins in eggs and cream cheese coagulating as they heat. This process is delicate—heat too quickly or too high, and those proteins tighten excessively, forcing out moisture (which causes cracks) and creating a rubbery texture.
The water bath technique (bain-marie) is crucial becuz it moderates temperature fluctuations. Water cannot exceed 212°F (100°C), which protects the delicate cheesecake from the oven’s fierce heat. Additionally, the evaporating water creates humidity, preventing the surface from drying out and cracking.
Chocolate adds another layer of complexity to the chemistry. It contains cocoa solids, cocoa butter, and sugar, each melting at different temperatures. When adding melted chocolate to the cheesecake batter, its temperature matters: too hot, and it can cook the eggs; too cool, and it can seize into unappealing flecks. The sweet spot is slightly warm but not hot—around 100°F (38°C).
The role of cocoa powder is often misunderstood. Dutch-processed cocoa (alkalized) has a neutral pH, providing smoother, more intense chocolate flavor than natural cocoa’s acidic bite. This makes it ideal for cheesecake, where we want chocolate complexity without acidity that might compete with the tangy cream cheese.
Serving & Pairing Suggestions for Triple Chocolate Cheesecake
Triple chocolate cheesecake is undeniably rich, so balance is key when planning your presentation. A simple raspberry or strawberry coulis provides a bright, acidic counterpoint that cuts through the richness beautifully. Simply puree fresh or frozen berries with a touch of sugar and strain to remove seeds.

For a more decadent presentation, warm some caramel sauce and drizzle it over individual slices just before serving. The contrast between warm caramel and cold cheesecake creates a delightful sensory experience.
When it comes to plating, less is more. A pristine slice on a white plate lets the layers speak for themselves. If you want to add visual interest, a light dusting of cocoa powder through a small sieve or a few fresh berries placed strategically will do the trick without overwhelming.
Beverage pairings depend on the time of day. For afternoon service, a medium-roast coffee highlights the cocoa notes without overwhelming them. After dinner, consider a tawny port or Pedro Ximénez sherry, whose raisin-like sweetness harmonizes with the chocolate intensity. For non-alcoholic options, a chai tea latte provides complementary spice notes that enhance rather than compete with the chocolate.
Conclusion: Mastering the Ultimate Chocolate Cheesecake
Triple chocolate cheesecake with Oreo crust represents dessert perfection—a thoughtful balance of textures, flavors, and visual appeal that makes it suitable for special occasions or an elevated everyday treat. The success of this recipe lies in understanding the delicate chemistry of cheesecake and respecting the unique properties of different chocolates.
The techniques you’ve mastered here—creating a proper water bath, layering ganaches, and achieving that perfect bake—transfer to countless other desserts. The patience required might feel challenging in our instant-gratification world, but the result is undeniably worth it.
Remember that like any culinary creation, your cheesecake will improve with practice. Each time you make it, you’ll develop a more intuitive understanding of how the batter should look, how jiggly is just right, and how to achieve those perfect clean slices. Even if your first attempt isn’t visually perfect, it will almost certainly be delicious—and isnt that what matters most in the end?
FAQs About Triple Chocolate Cheesecake
How do I prevent my cheesecake from cracking?
Three key strategies work together to prevent cracking: 1) Using room temperature ingredients for a smoother batter, 2) Baking in a water bath to regulate temperature and add humidity, and 3) Cooling gradually in the oven with the door ajar. Over-mixing after adding eggs is another common culprit, as it incorporates air that expands and contracts during baking.
Can I make this cheesecake without a springform pan?
While a springform pan is ideal, you can use a deep dish pie plate or cake pan lined with parchment paper with long “handles” extending up the sides. After chilling, carefully lift the cheesecake out using the parchment handles. The presentation won’t be quite as neat, but the flavor remains unchanged.
How far in advance can I make this cheesecake?
This is one of those rare desserts that actually improves with time! You can make it up to 3 days in advance and store it in the refrigerator. The flavors will continue to develop and meld together beautifully. For longer storage, the cheesecake can be frozen (without the ganache toppings) for up to 2 months—just thaw overnight in the refrigerator and add the ganache layers before serving.
What’s the best way to slice cheesecake cleanly?
For bakery-quality slices, dip a long, thin knife in hot water, wipe it dry, and make a clean cut. Repeat the process (dipping, wiping, cutting) for each slice. The heat helps the knife glide through the dense cheesecake without dragging or tearing. For the absolute cleanest cuts, partially freeze the cheesecake (about 30 minutes) before slicing.
Why did my ganache separate or become grainy?
Ganache typically separates or becomes grainy when the chocolate gets too hot or if water accidentally gets into the mixture. If this happens, you can often rescue it by whisking in a few additional tablespoons of warm cream to re-emulsify the mixture. Next time, ensure your cream is just simmering (not boiling) and that all utensils are completely dry.

Veronica is a passionate food enthusiast with over three years of experience in exploring and writing about diverse cuisines. Her expertise lies in reviewing restaurants, sharing creative recipes, and discovering the latest food trends. As the voice behind FoodieRecap.com, Anju brings fresh perspectives and culinary insights to her audience.
